Creating Campaigns
Learn how to create Broadcast and Drip WhatsApp campaigns in RateUp.
This guide explains how to create WhatsApp campaigns in RateUp.
RateUp supports:
- Broadcast Campaigns
- Drip Campaigns
Both campaign types use approved WhatsApp templates for sending messages.
Creating a Broadcast Campaign
Broadcast campaigns are used to send one-time messages to customers.
Examples include:
- Promotions
- Discounts
- Announcements
- Loyalty updates
Open Campaigns
To access Campaigns:
- Open the RateUp dashboard
- From the sidebar, click Campaigns
Start Creating a Broadcast Campaign
To create a broadcast campaign:
- Click Create Campaign
- Select Broadcast Campaign
The campaign creation dialog will open.
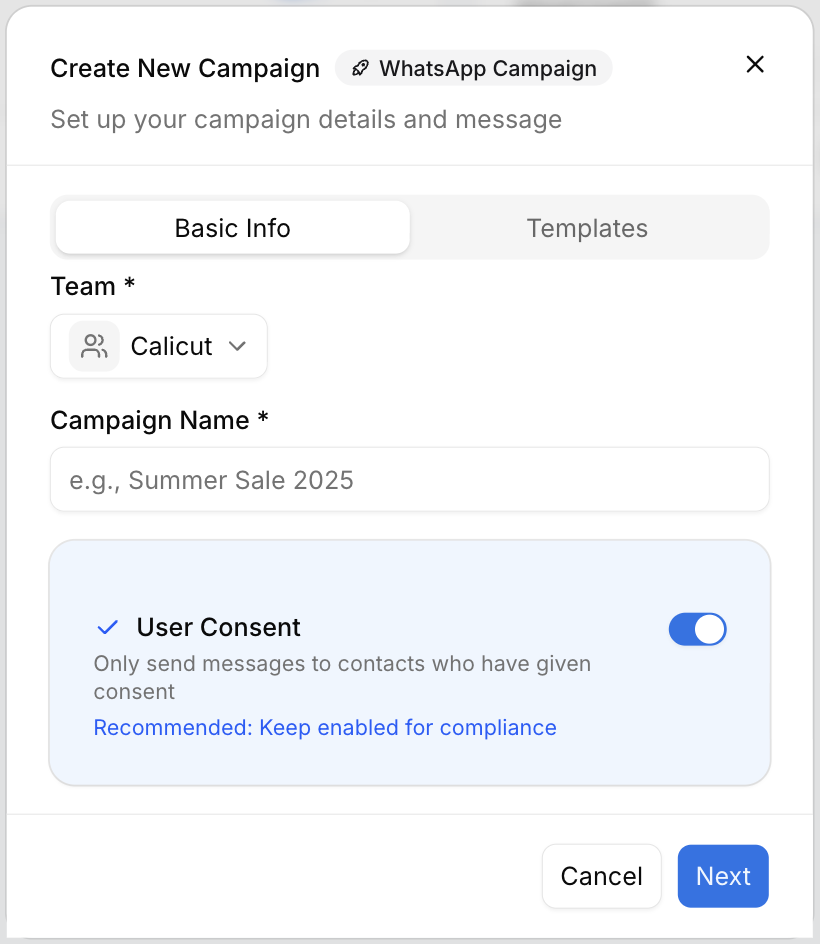
Configure Basic Information
In the Basic Info tab:
Select Team
Choose the team that will manage the campaign.
Example:
- Main
- Calicut
Enter Campaign Name
Provide a campaign name.
Examples:
- Summer Sale 2025
- Weekend Offer
- Loyalty Promotion
Enable User Consent
The User Consent option ensures messages are only sent to customers who have agreed to receive communication.
Keeping this enabled is recommended for compliance.
Continue to Templates
After entering the required details:
- Click Next
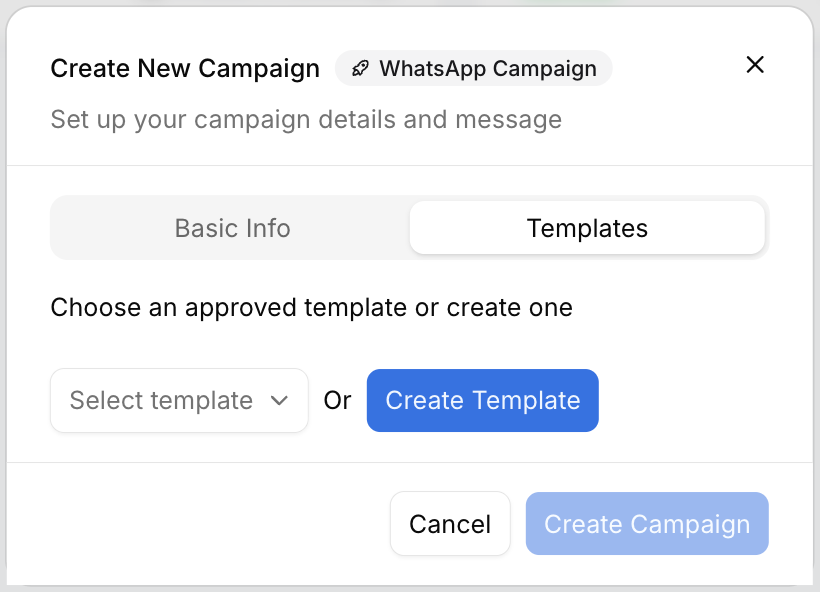
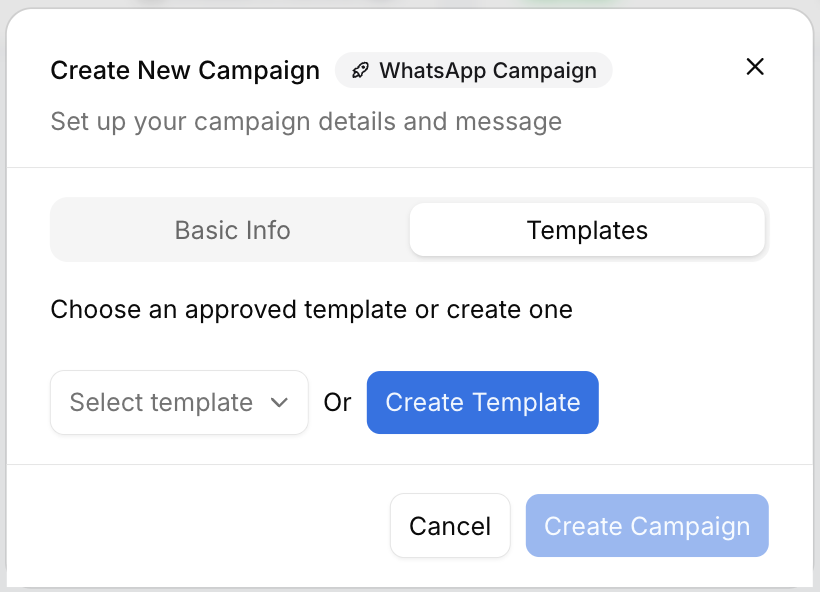
- Open the Templates tab
Select a WhatsApp Template
Choose an approved WhatsApp template.
View Available Templates
Click the template dropdown to view approved templates.
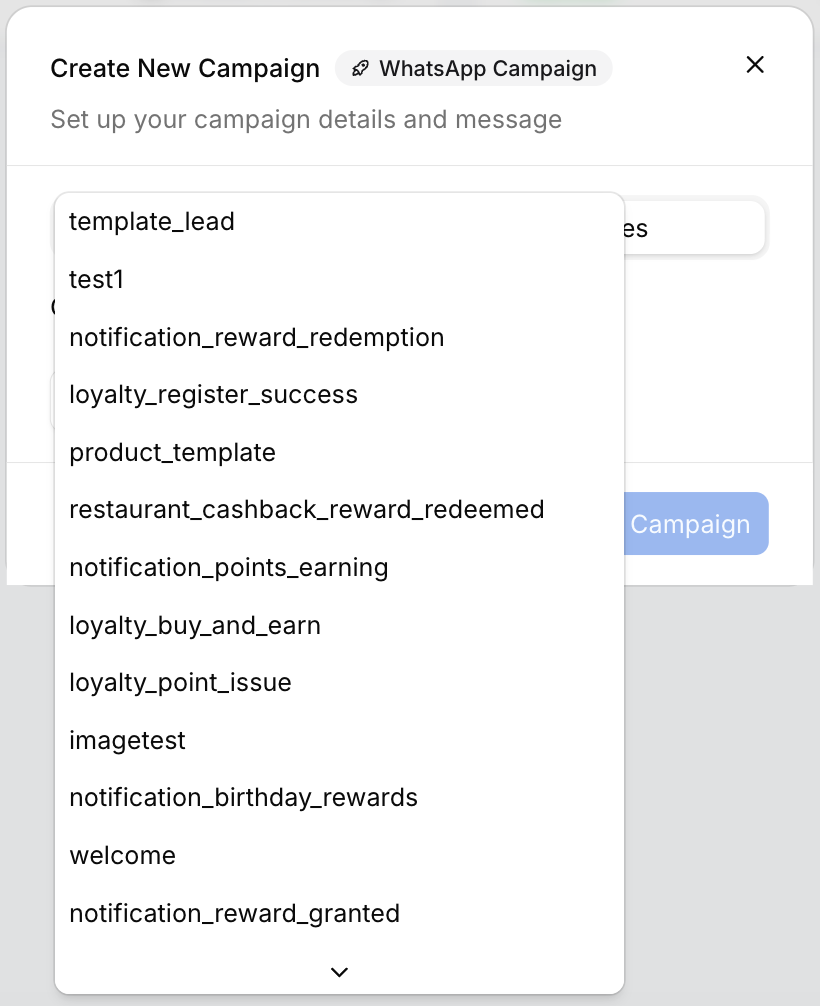
Examples include:
- loyalty_register_success
- loyalty_buy_and_earn
- notification_reward_redemption
- notification_points_earning
- notification_birthday_rewards
Only approved templates can be used in campaigns.
Create a New Template
If a suitable template is unavailable:
- Click Create Template
- Create and submit the WhatsApp template
- Wait for approval
- Return and select the template
For detailed steps, see WhatsApp Templates.
Configure Dynamic Variables
Some templates contain placeholders for dynamic customer information.
Map each variable to the correct data field.
Example:
- Variable 1 → Name
- Variable 2 → Phone Number
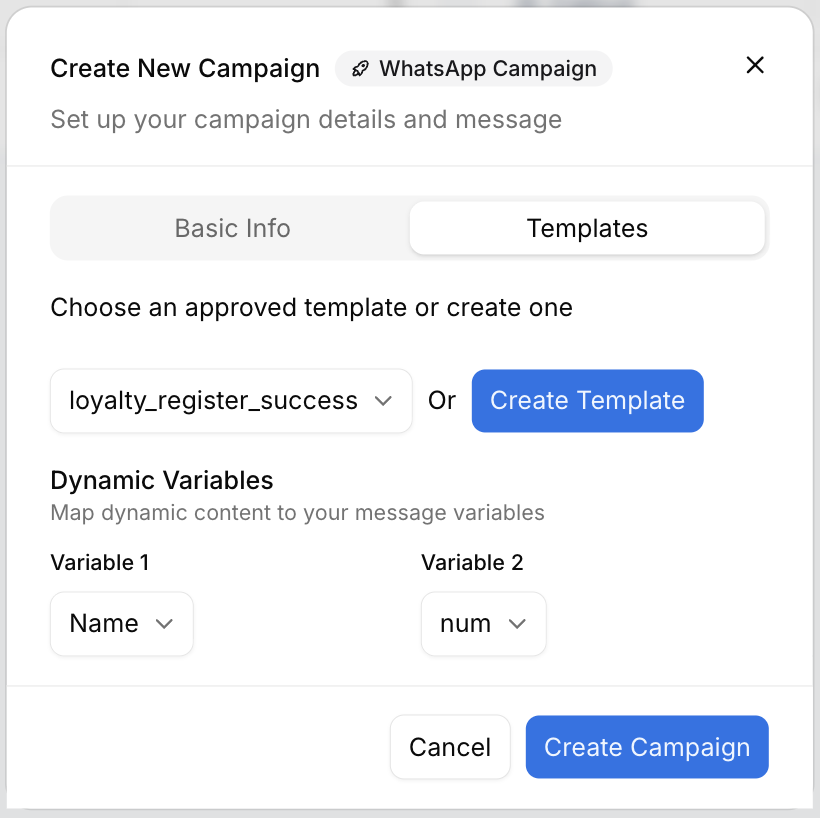
Dynamic variables personalize campaign messages automatically.
Create the Broadcast Campaign
After configuration:
- Review the campaign settings
- Click Create Campaign
The campaign will appear in the Campaigns dashboard.
Creating a Drip Campaign
Drip campaigns allow businesses to send automated message sequences over time.
These campaigns are commonly used for:
- Customer onboarding
- Follow-up reminders
- Loyalty nurturing
- Engagement automation
Start Creating a Drip Campaign
To create a drip campaign:
- Click Create Campaign
- Select Drip Campaign
The drip campaign creation dialog will open.
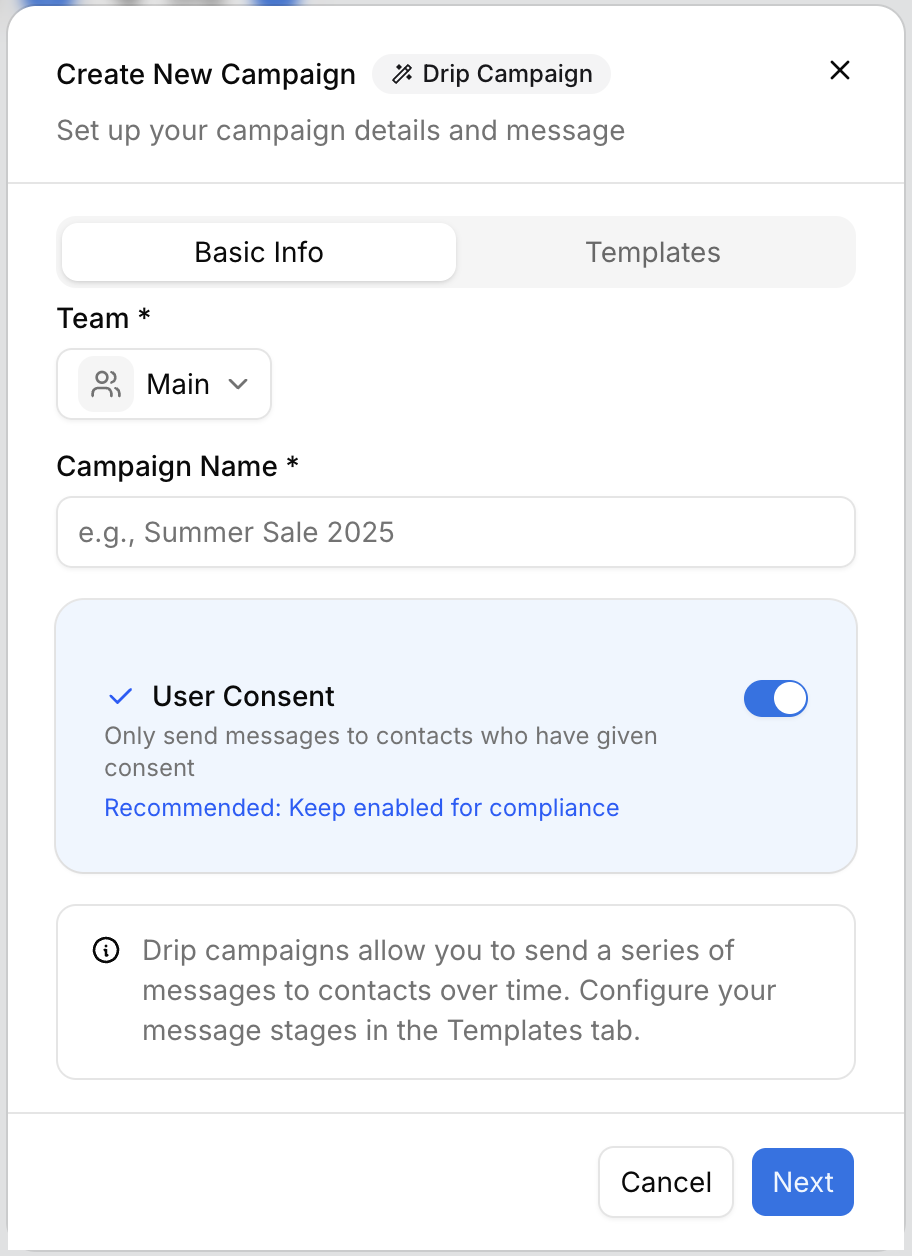
Configure Drip Campaign Information
In the Basic Info tab:
Select Team
Choose the team responsible for the campaign.
Enter Campaign Name
Provide a name for the drip campaign.
Examples:
- Welcome Journey
- Loyalty Follow-up
- Customer Retention Flow
Enable User Consent
The User Consent option ensures messages are sent only to customers who have given consent.
Continue to Templates
After configuring the campaign details:
- Click Next
- Open the Templates tab
Configure Drip Campaign Stages
Drip campaigns support multiple stages.
Each stage can:
- Use a different WhatsApp template
- Be delayed by a specific time
- Be scheduled for a specific hour
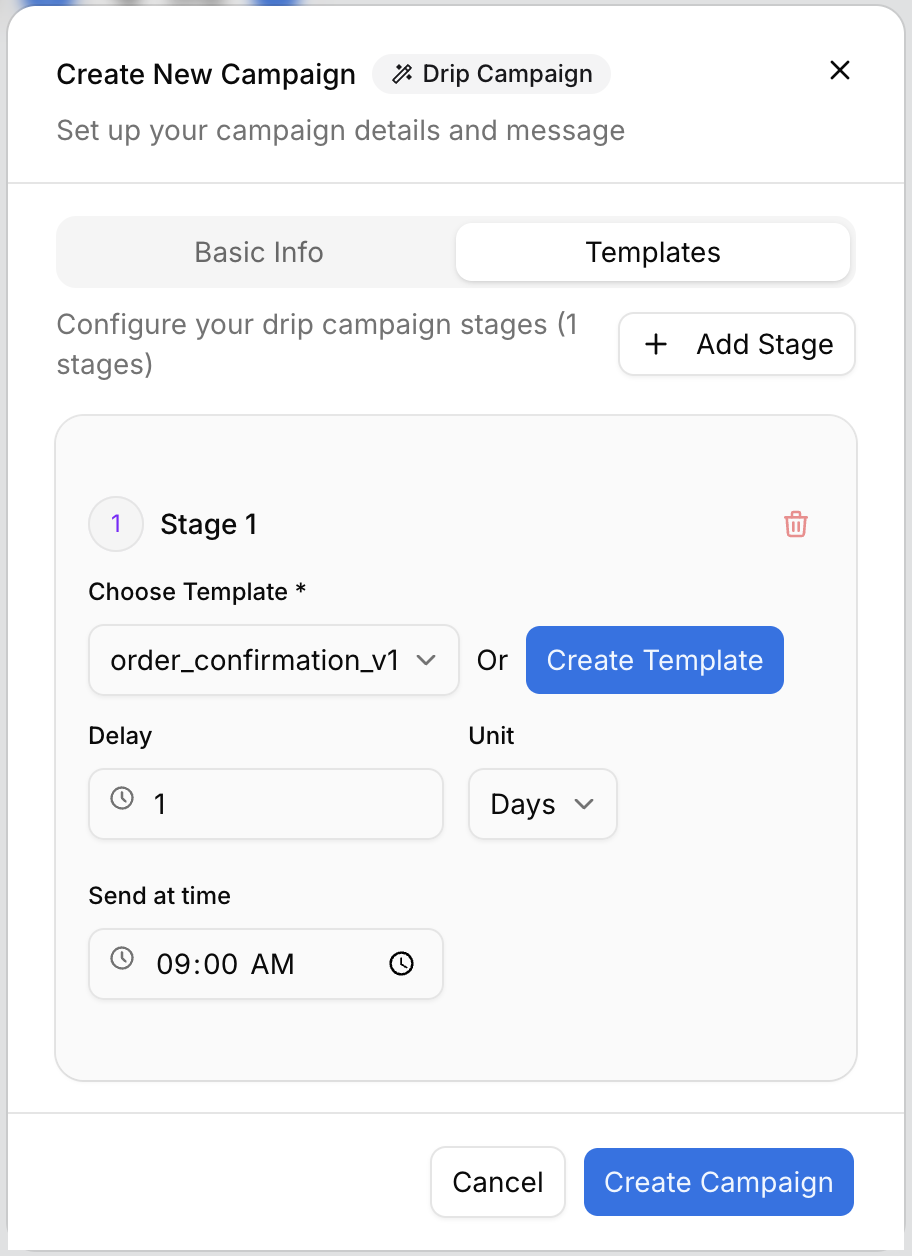
Configure a Stage
For each stage:
Select Template
Choose an approved WhatsApp template.
Or click Create Template to create a new one.
Configure Delay
Enter how long the system should wait before sending the message.
Example:
- 1 Day
- 2 Hours
- 7 Days
Select Delay Unit
Choose the delay type:
- Minutes
- Hours
- Days
Configure Send Time
Choose the exact time the message should be delivered.
Example:
- 09:00 AM
Add More Stages
To create additional drip steps:
- Click Add Stage
- Configure another template and delay
This allows businesses to build complete automated journeys.
Create the Drip Campaign
After configuring all stages:
- Review the campaign flow
- Click Create Campaign
The drip campaign will appear in the Drip Campaigns list.
Important Notes
- Only approved WhatsApp templates can be used
- Drip campaigns can contain multiple stages
- Delays determine when each stage is sent
- User consent should remain enabled for compliance
- Campaigns can be activated or paused anytime