Search, Selection & Sorting
Every control in the Inbox toolbar — search, compact list, bulk select, close, assign and delete, export, sorting and adding a contact.
The toolbar sits above the conversation list. The left side names the view you are in; the right side holds the actions.
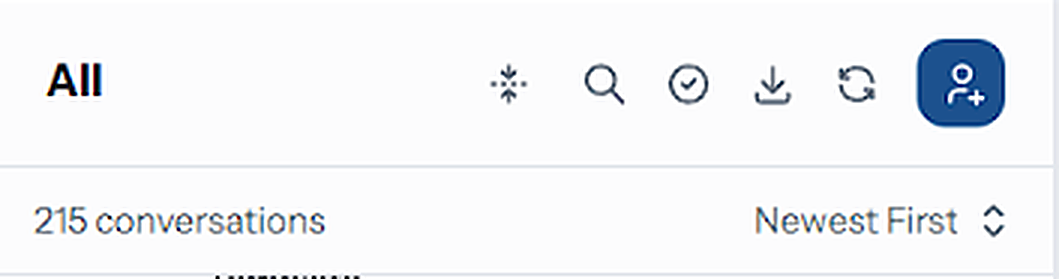
| Icon | Tooltip | What it does |
|---|---|---|
| ↕️ | Switch to compact list / Switch to detailed list | Toggle between full rows and one-line rows |
| 🔍 | Search | Find tickets by contact name or phone number |
| ✅ | Select Chats | Turn on selection mode for bulk actions |
| ⬇️ | Download Chats | Export conversation history |
| 🔄 | Refresh | Reload the list |
| 👤➕ | New Contact | Add a WhatsApp contact and start a conversation |
Below them, a second row shows the count for the current view on the left and the sort control on the right.
The count comes from the server, so it reflects the entire view — not just the rows loaded so far. While a search is running it shows the number of matching rows instead. In Spam it counts contacts, because that tab lists one row per contact.
Filtering is not in this toolbar. Channel, lifecycle, label, tag, user and team filters live in the sidebar — see Sidebar Filters.
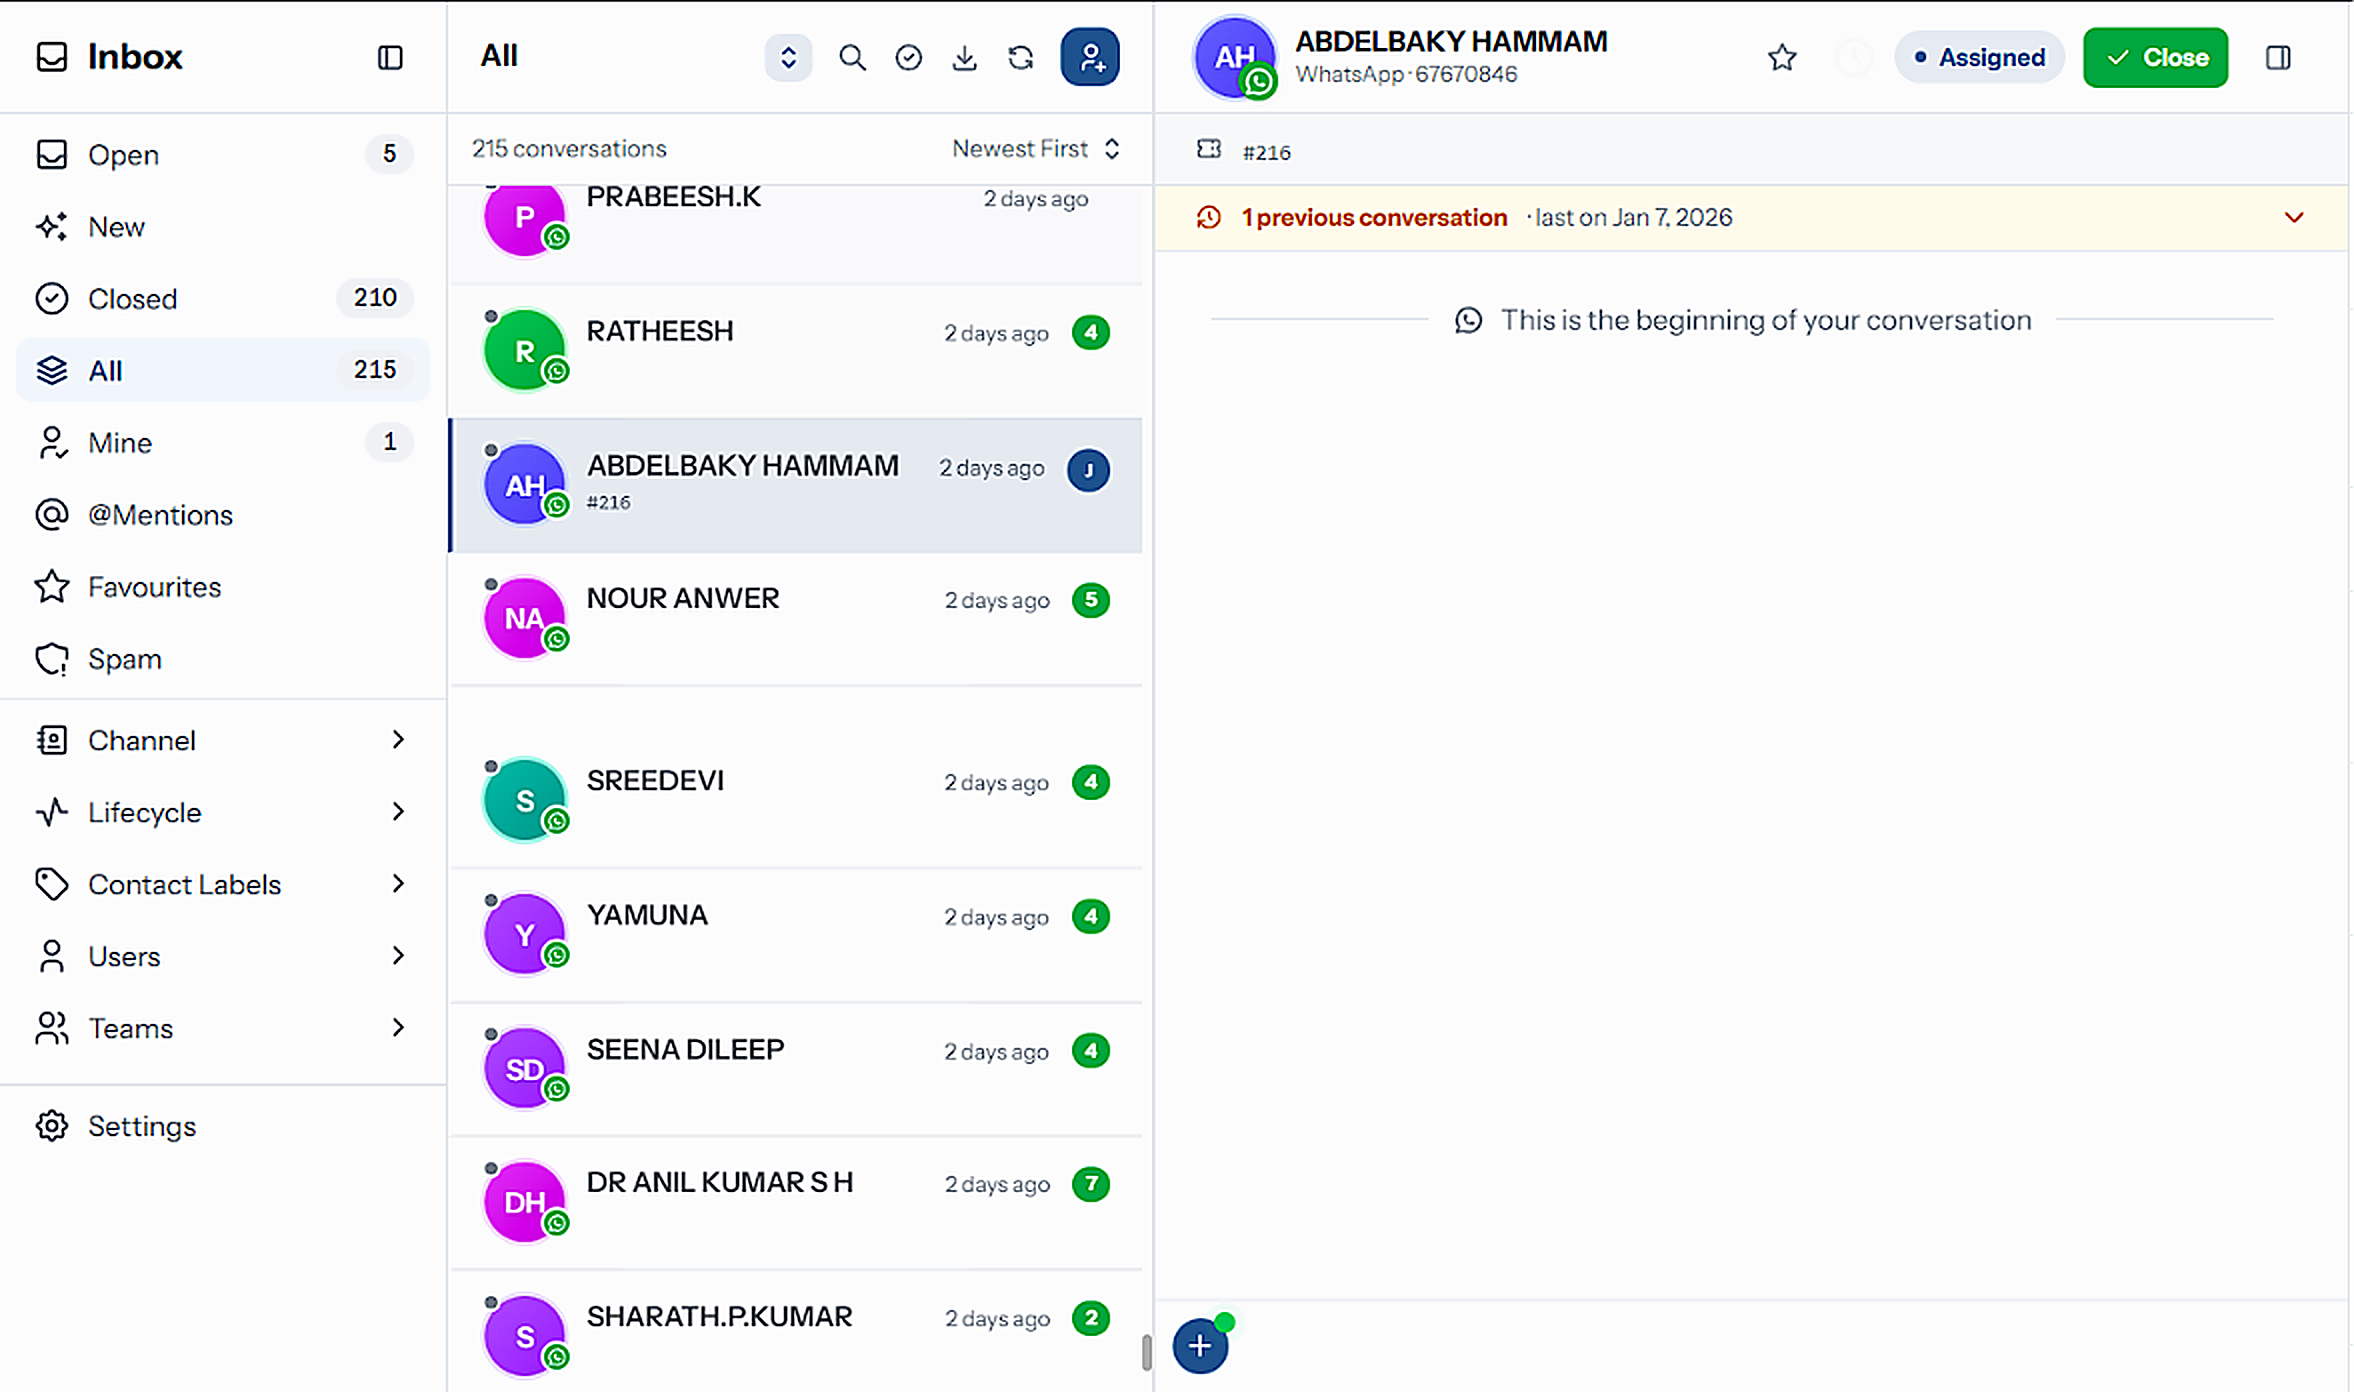
Switch to a Compact List
Click the compact list icon, the first in the toolbar, to fit more tickets on screen.
| Detailed list | Compact list | |
|---|---|---|
| Name, time, unread badge, assignee | ✅ | ✅ |
#number and ticket title | ✅ | ✅ |
| Last-message preview | ✅ | — |
| Chip row — status, channel, mention, labels, tags, stage | ✅ | — |
The icon is highlighted while the compact list is on. Click it again to go back.
The choice is remembered in this browser and survives clearing your filters. It is a display preference only and never changes which tickets are listed.
Search
Click the search icon. A Search contact... bar slides over the toolbar.
Type a contact name or phone number. Results narrow as you type.
Click the ✕ to clear the search and restore the full view.
Search runs within the current view. To search everything — open and closed — switch to All first.
Searching for a number you have never messaged
If you search for a 10-digit phone number and nothing matches, the list offers to add it: "This PhoneNumber is not in your contact list. Message … on WhatsApp?" Click Add and Message to open the Add New Contact form with the number already filled in. The form is described under Adding a Contact below.
Any other search with no results reads "No chats found — search for a valid phone number or contact name".
Sorting
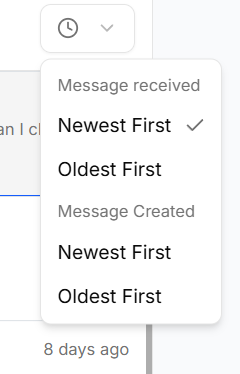
| Group | Options |
|---|---|
| Message received | Newest First · Oldest First |
| Message Created | Newest First · Oldest First |
Newest First is the default and suits day-to-day work. Switch to Oldest First when you are hunting for tickets that have been waiting too long.
Bulk Actions
Selection mode lets you close, assign or delete many tickets in one go. This is the fastest way to clear out a backlog, and it's useful at shift changes too.
Select tickets
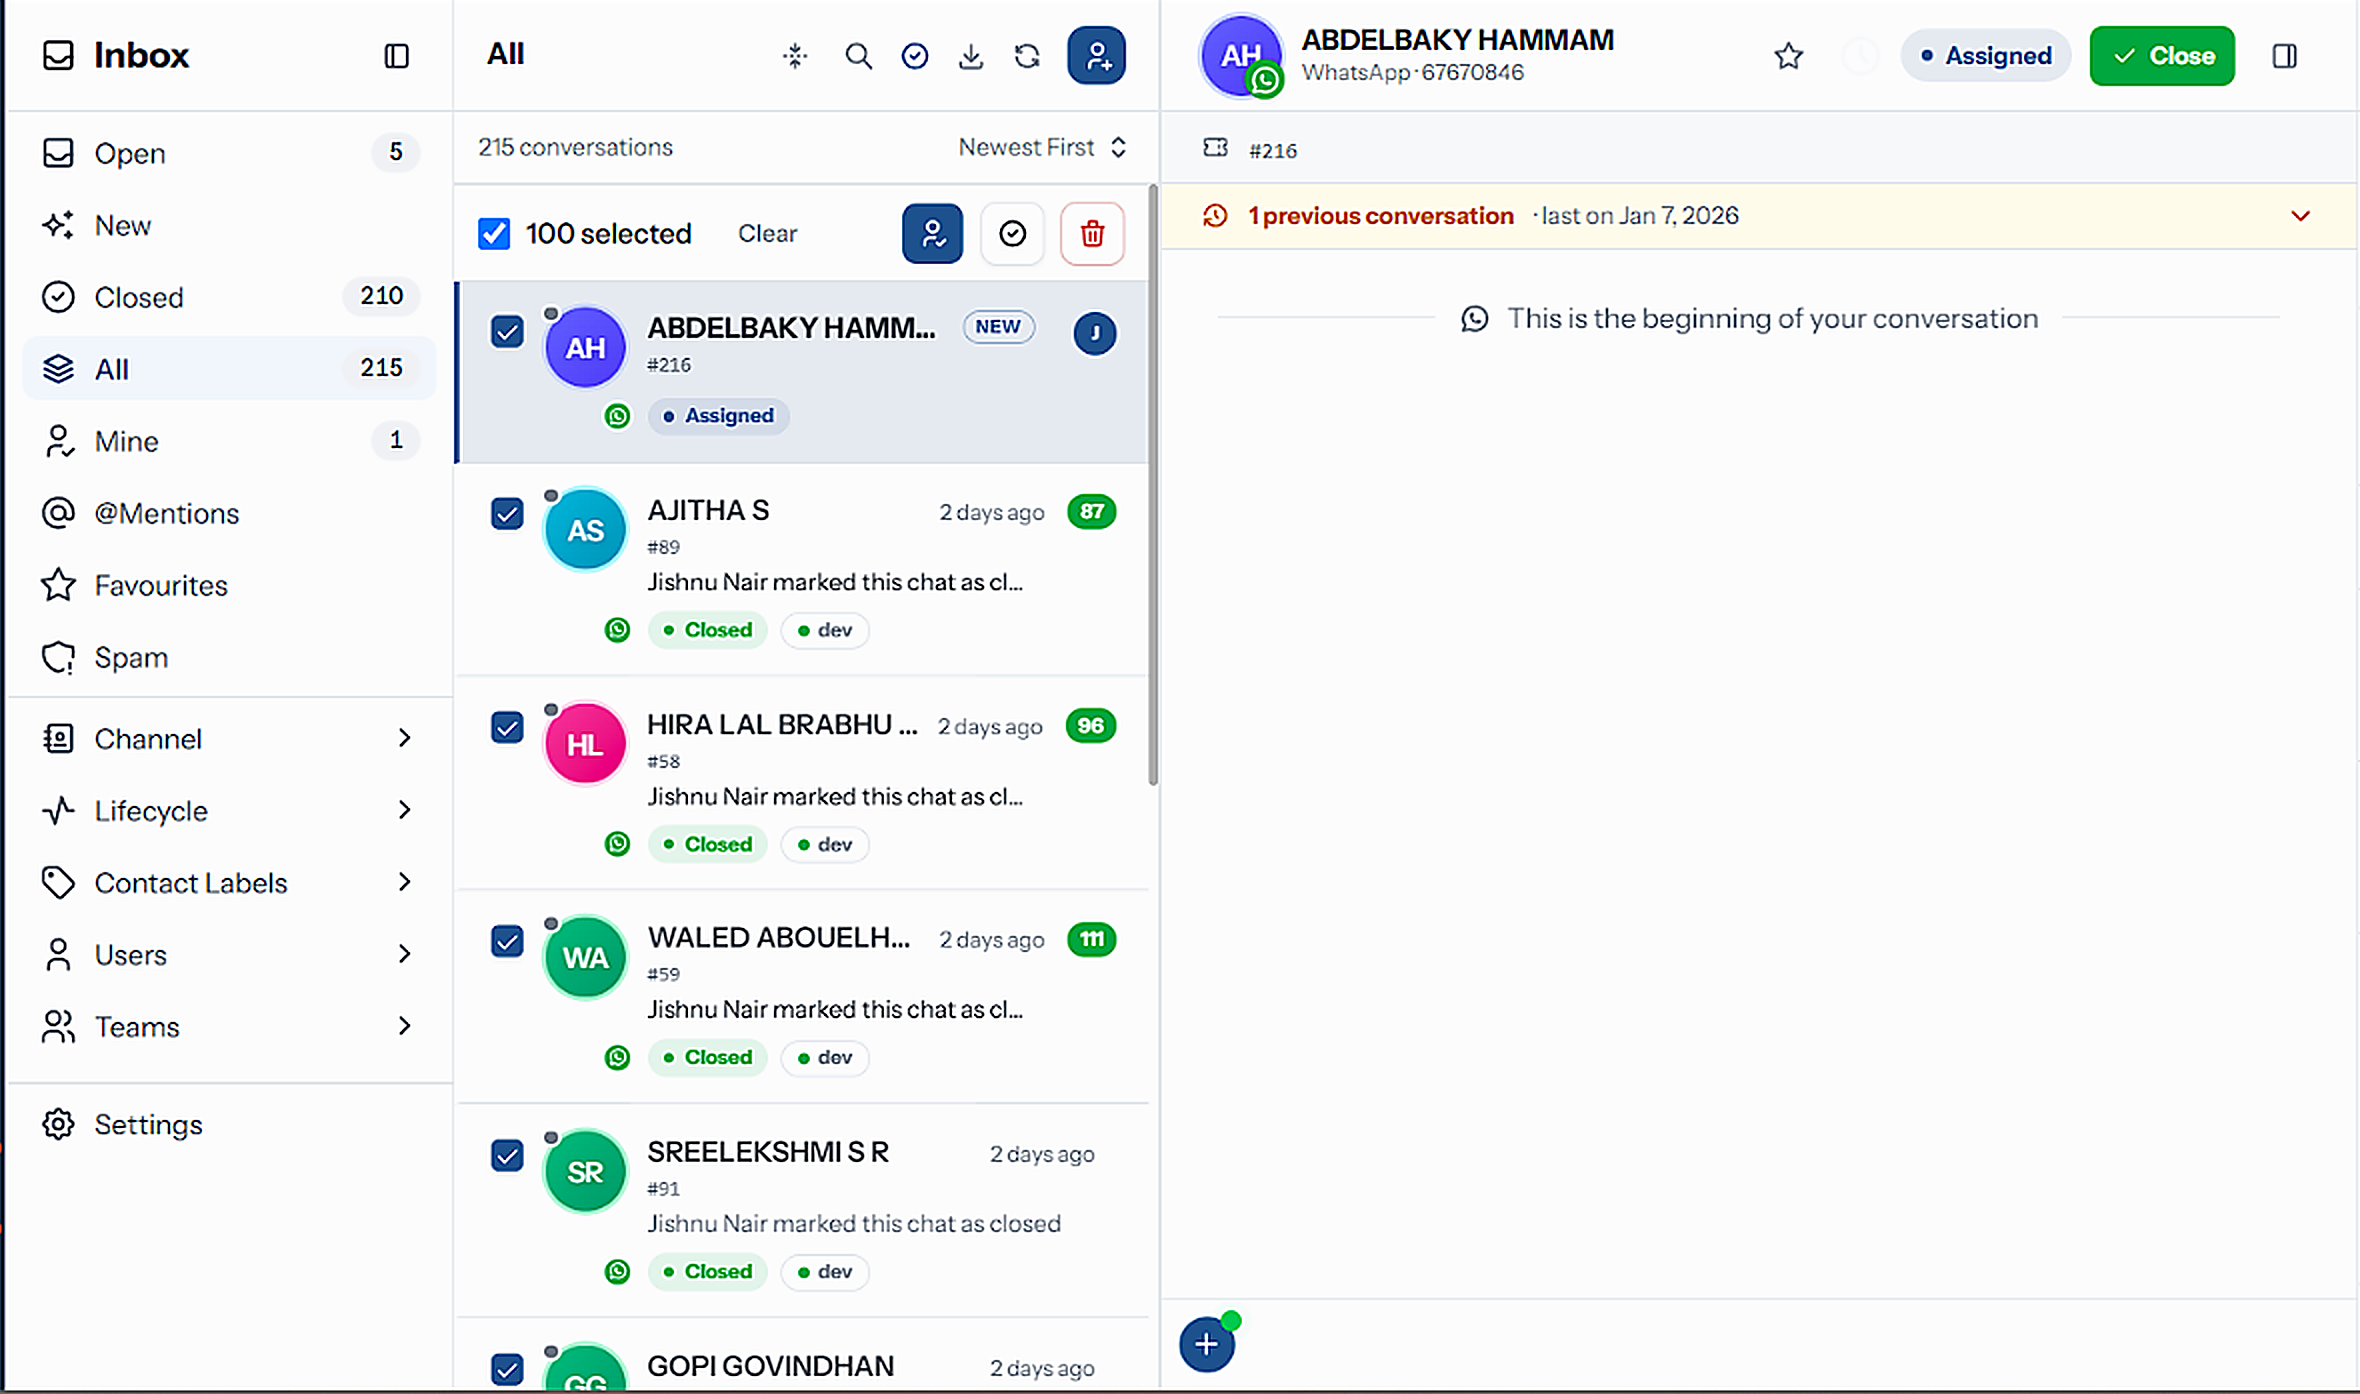
Click the Select Chats (✅) icon in the toolbar. It turns blue and a checkbox appears on every row.
Tick the tickets you want, or click anywhere on a row. While selection mode is on, clicking a row ticks it instead of opening it.
Once at least one row is ticked, a selection bar appears above the list showing "N selected".
The selection bar holds:
| Control | What it does |
|---|---|
| Select-all checkbox | Ticks every ticket currently loaded in the list. Click it again to untick them all |
| N selected | How many tickets are ticked |
| Clear | Unticks everything but stays in selection mode |
| Assign selected chats (person ✓) | Assign every ticked ticket to one person — see below |
| Close selected chats (✓ circle) | Close every ticked ticket — see below |
| Delete selected chats (bin, red) | Permanently delete every ticked ticket — admins only |
Select all only covers the rows that have loaded. The list loads more tickets as you scroll, so to select a long view, scroll to the bottom before ticking the select-all checkbox. Compare the "N selected" figure with the count above the list before you act.
Click the Select Chats icon again to leave selection mode. It also turns off automatically when you switch views.
Which actions each view offers
| View | Assign | Close | Delete |
|---|---|---|---|
| Open, New, All, @Mentions, Favourites | ✅ | ✅ | ✅ |
| Mine | — | ✅ | ✅ |
| Closed | ✅ | — | ✅ |
| Spam | — | — | ✅ |
Delete is only shown to Admins and Super Admins.
Close Many Tickets at Once
Enter selection mode and tick the tickets to close. Use the select-all checkbox to take the whole loaded list.
Click Close selected chats (the ✓ circle) in the selection bar.
Confirm: "Close selected chats? Are you sure you want to close the selected chats." Click Confirm.
Every selected ticket closes with the status Closed, its assignees are cleared, and it moves to the Closed view. The selection bar closes and the list refreshes.
Bulk close does not ask for an outcome. To record Resolved or Unresolved instead, close those tickets one at a time from the chat header. See Closing & Reopening.
Bulk close works per customer. For each customer you selected, it closes their most recent ticket. If a customer has two open tickets and you ticked the older one, the newer one is the one that closes. Close a customer's older tickets individually from the chat header.
Assign Many Tickets at Once
Enter selection mode and tick the tickets.
Click Assign selected chats (the person icon). A dialog opens: "Assign N Chats".
Pick a team under Select Team, then a person under Select Member. Each member shows whether they are online.
Click Assign Chats. Or skip the pickers and click Assign To Me to take them all yourself.
Bulk assignment replaces whoever was assigned before. Each ticket ends up with exactly the one person you picked. Like bulk close, it acts on each selected customer's most recent ticket.
Delete Many Tickets at Once
Admins and Super Admins can permanently delete tickets and every message in them.
Enter selection mode and tick the tickets.
Click Delete selected chats (the red bin).
Read the confirmation — "Delete N conversations" — and click Delete.
Deleting cannot be undone. Every message in the selected tickets is removed for everyone, and it does not appear in exports or reports afterwards. The contacts themselves are not deleted, and their other tickets are untouched. To take a customer out of your working views without losing anything, mark them as spam instead.
You can delete up to 200 tickets in one go. If a colleague deleted one of your selected tickets in the meantime, the rest are still deleted.
To delete a single ticket, see Deleting a Conversation.
Exporting
Click the download icon to open Export Whatsapp chats.
Choose how to bound the dates: Between, Before, After or On.
Pick the date — or, for Between, a from and a to date. Export stays disabled until the date is filled in.
Optionally tick:
- Replies Only — export only the messages your customers sent, leaving out everything your team and your automations sent
- Inclusive — include the chosen day itself (offered for Before and After; Between always includes both end dates)
Click Export. A "Exporting chats..." notice shows while the file is prepared.
Each row of the file is one message, with its date, the customer's phone and name, and the text in a received or sent column. A template you sent is listed by its template name.
The export covers every conversation in your organisation within the dates you pick. The view you are in, your search and the sidebar filters do not narrow it. Keep the date range tight, and check the file before sharing it outside the company.
Messages that were deleted on WhatsApp keep their row in the export but their text is withheld — the cell reads "This message was deleted". Tickets you deleted in RateUp are not exported at all.
Adding a Contact
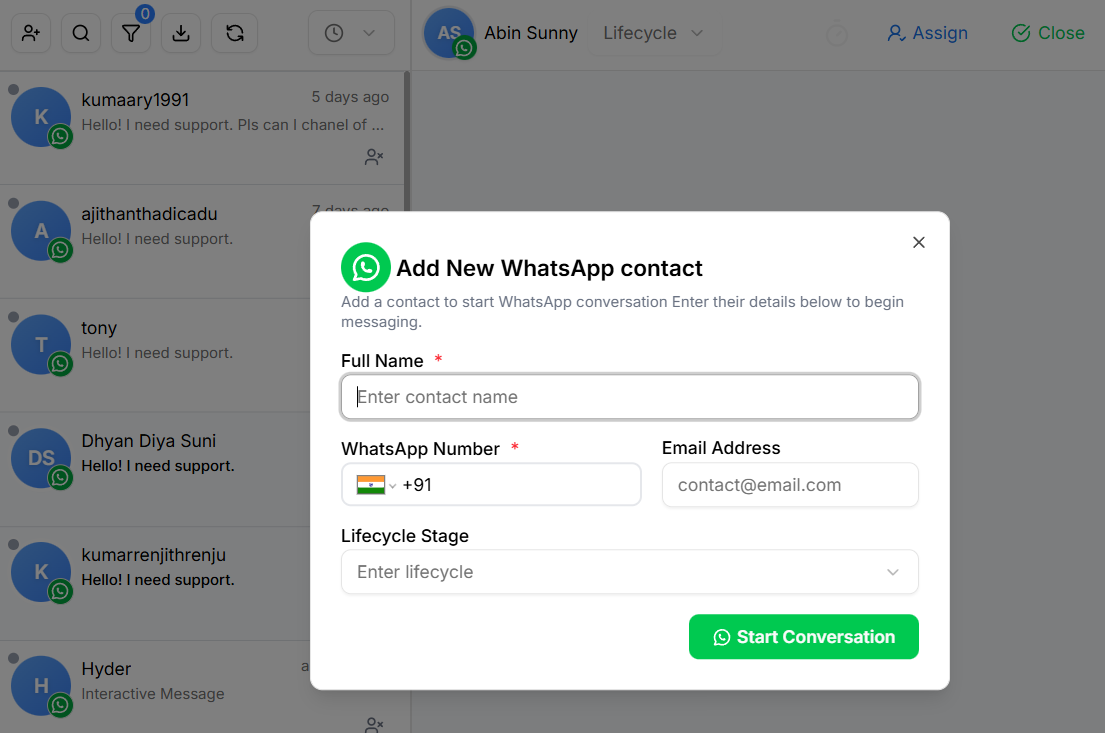
Click New Contact (the blue person + button) in the toolbar. The Add New WhatsApp contact dialog opens.
Enter the Full Name and WhatsApp Number. Email Address is optional.
Optionally pick a Lead stage to put the contact straight onto your pipeline board. The field only appears if your board has stages.
Click Start Conversation.
The new contact opens in the chat window straight away, ready for your first message.
Starting a conversation with someone who has not messaged you first means there is no open 24-hour window — your first message must be an approved template.
Refreshing
The Inbox updates live, but the refresh icon forces a reload and spins while it runs. Use it if a colleague tells you about a ticket you cannot see, or after a bulk change made elsewhere.
Related Pages
- Inbox Views — the list before you filter it
- Sidebar Filters — channel, lifecycle, labels, tags, users and teams
- Closing & Reopening — close outcomes and deleting one ticket
- Assignment & Reassignment
Ticket Details Panel
The right-hand panel — assignment, title and description, lead stage, conversation tags, contact labels, contact and ticket info, spam and delete.
Conversation Tags & Contact Labels
Tag a single ticket, or label the customer behind it — two separate taxonomies, both of which filter the Inbox.