Ticket Details Panel
The right-hand panel — assignment, title and description, lead stage, conversation tags, contact labels, contact and ticket info, spam and delete.
The Ticket Details panel is everything about a ticket and its customer that does not belong in the message thread.
Open it with the panel icon at the far right of the chat header (Toggle details panel); close it with the chevron in the panel's own header. On a wide screen it sits beside the conversation. On a narrower one it opens over it.
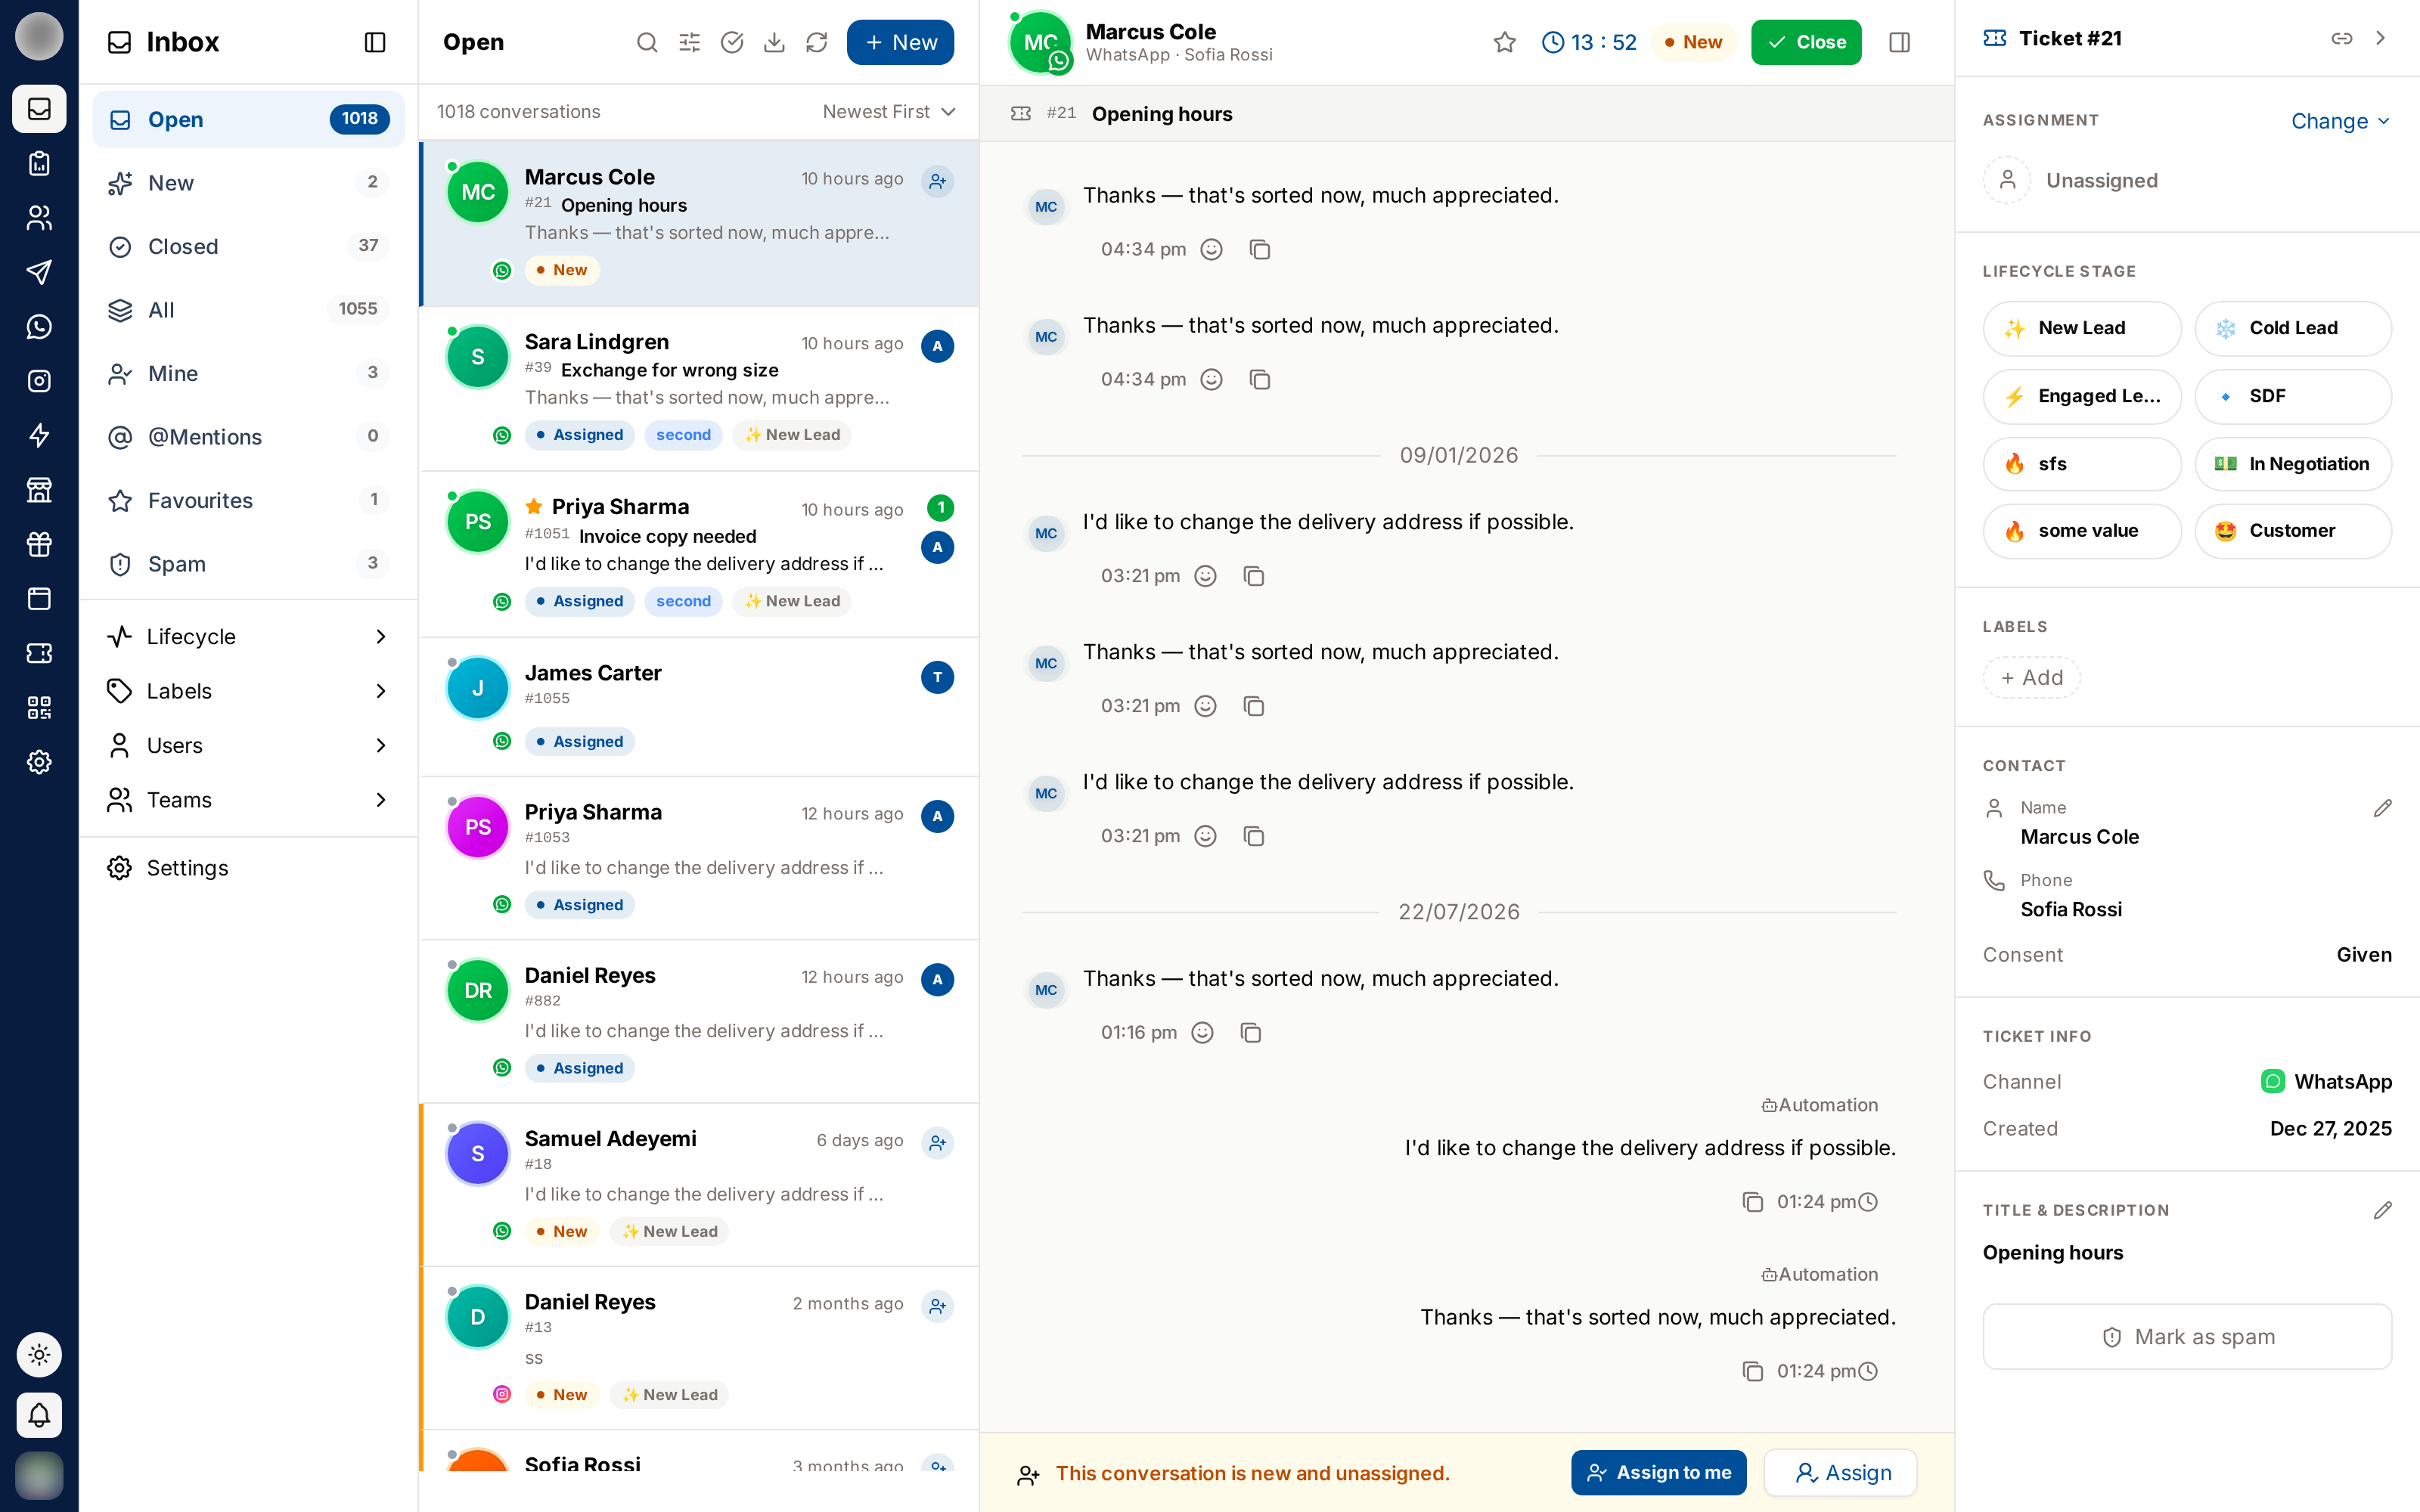
From top to bottom:
| Section | Belongs to |
|---|---|
| Assignment | The ticket |
| Title & Description | The ticket |
| Lead stage | The contact |
| Conversation Tags | The ticket |
| Contact Labels | The contact |
| Contact | The contact |
| Ticket Info | The ticket |
| Mark contact as spam / Delete conversation | The contact / the ticket |
Panel Header
| Control | What it does |
|---|---|
| Ticket #number | The ticket's identity |
| Copy link to ticket (🔗) | Copies a link to this ticket to your clipboard; the icon briefly reads Copied |
| Collapse Panel (›) | Hides the panel to give the conversation more room |
Assignment
Shows the first assignee and their team, with +N if there are more, or Unassigned.
Click Change.
Open the Assign picker, expand a team, and tick people — or use Assign entire team. Online / offline status is shown next to each person.
Click Done to collapse the section.
Title & Description
The ticket's own words, directly under Assignment because they are what an agent reads first. A ticket with no title shows Untitled ticket.
Click the pencil (Edit title and description).
Write a short, specific Ticket title. It is what your team reads in the conversation list.
Add a Description for context the messages do not make obvious.
Click Save, or Cancel to discard.
| Good title | Weak title |
|---|---|
| Refund not received for order 8821 | Question |
| Wrong size delivered — needs exchange | Customer issue |
| Bulk pricing request, 200 units | Follow up |
Hover a title in the conversation list to read its description without opening the ticket.
Lead Stage
One row showing where this customer sits on your pipeline board. It shows the current column in that column's colour, or Not on the board.
Click the stage row to open the picker. It lists every column on the board, each marked as open, won or lost.
Click a column. The customer moves there — a lead is opened for them if they had none.
To take the customer off the board, open the picker and choose Remove from the board at the bottom, then confirm with Remove.
Remove from the board deletes the lead. Its notes, tasks, timeline and assignees go with it, and the confirmation counts each of them first. To record a deal that did not happen, mark it lost instead.
This belongs to the contact, so it applies to all of their tickets and shows as a chip on each of their rows. The section is absent for organisations without the Pipeline feature, and on a board with no columns. Columns are configured in Pipeline → Stages.
Conversation Tags
Tags on this ticket only — Bug Report, Escalated, Refund.
Click + Add.
Tick the tags that apply; untick to remove. Or click the ✕ on a tag chip.
If no tags exist yet, the picker reads "No conversation tags yet — create them in Inbox Settings." Tags & labels →
Contact Labels
Colour-coded labels on the customer — VIP, wholesale, churn risk.
Click + Add.
Tick the labels to apply; untick to remove. Or click the ✕ on a label chip.
Labels show on every conversation row for that customer, and filter the Inbox from the sidebar's Contact Labels section.
Contact
| Field | Notes |
|---|---|
| Name | Click the pencil (Edit name), type, then Save |
| Phone | The customer's number |
| Customer since | Month and year the contact was created |
| Consent | Given or Not given |
Renaming here updates the contact everywhere in RateUp — campaigns, contact lists and every one of their tickets. For other fields, open the contact under Contacts.
Consent controls whether this customer may receive template messages. A contact without consent shows a DND badge next to their name in the chat header.
Ticket Info
Read-only facts about this ticket:
| Field | Meaning |
|---|---|
| Channel | WhatsApp, Instagram, Messenger or Webchat |
| Account | Which of your numbers or accounts the ticket came in on — marked (no longer connected) if you have since disconnected it |
| Created | When the ticket was opened |
| Result | The outcome it was closed with, if any |
Account is read from the ticket's own messages, so it stays correct even if the customer has since written to a different number of yours.
Spam and Delete
Two buttons at the foot of the panel.
Mark contact as spam — the same action as Close → Mark contact as spam. It flags the contact, closes their open tickets and moves them into the Spam tab. If the contact is already flagged, the button reads Not spam and takes them back out. More about spam →
Delete conversation — admins only. Permanently deletes this ticket and every message in it, after a confirmation. The contact and their other tickets are untouched. More about deleting →
Ticket Fields vs Contact Fields
Knowing which is which saves confusion:
| Belongs to the ticket | Belongs to the contact |
|---|---|
| Title and description | Name, phone, email |
| Assignment | Lead stage and lifecycle |
| Conversation tags | Contact labels |
| Status and result | Consent |
| Created and closed dates | Custom fields |
| Favourite star | Spam and blocked flags |
Change a contact field and it applies to every ticket that customer will ever have. Change a ticket field and only this ticket is affected.
Related Pages
- Tickets & Conversations
- Conversation Tags & Contact Labels
- Pipeline — the board the lead stage writes to
- Assignment & Reassignment
- Closing & Reopening
Closing & Reopening Tickets
The ticket lifecycle end to end — the three close outcomes, closing in bulk, blocking, reopening, and permanently deleting a conversation.
Search, Selection & Sorting
Every control in the Inbox toolbar — search, compact list, bulk select, close, assign and delete, export, sorting and adding a contact.