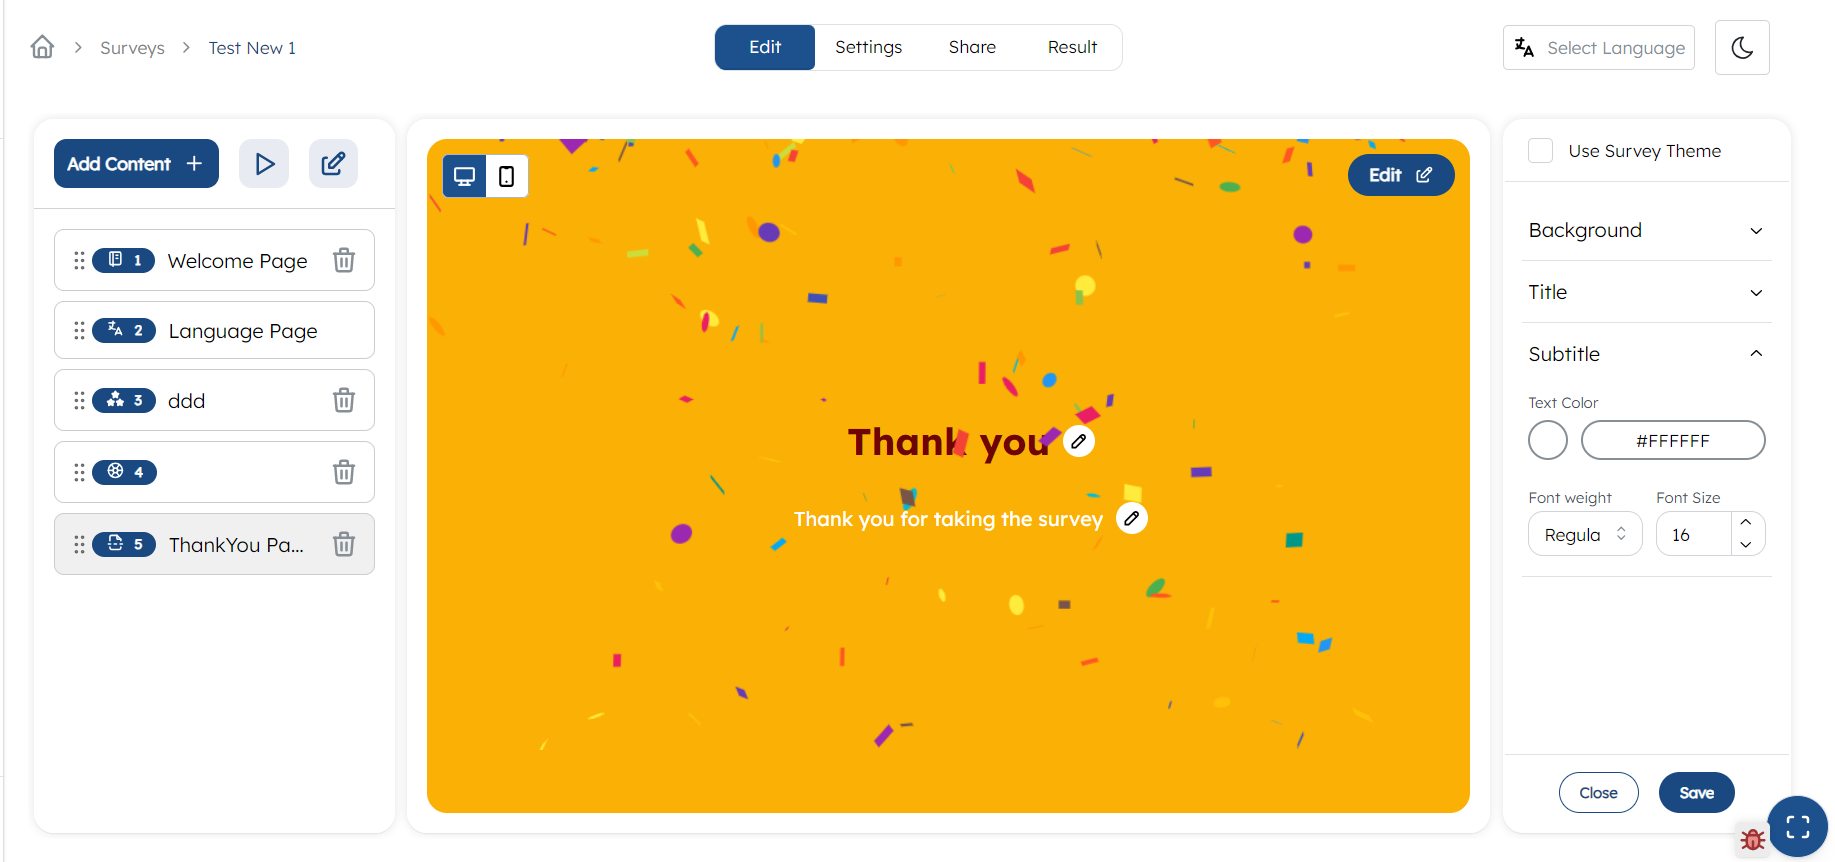
Thank You Page
The respondents will be redirected to Thank you page once they completed the survey. You can also customize thank you page.
To create Thank you page, click on Add Content in the survey editor and click on Thank You Page.
The Thank You Page will be created by by default when creating survey. You can delete it if you don't need a thank you page.
Customizing Thank You Page
You can customize Thank You Page according to your preference. You can either use survey theme or individually change each items. By default, it will use survey theme. You can disable it by unticking the Use Survey Theme.
To change contents of title or subtitle, click on these items or pencil icon right to this. To style thank you page, click on Edit button on the top right. An editor will open in the right side.
You can customize following:
1. Background
- Click on
Background. - Choose the background,either color or image: If you have choosed image, then click on upload button and upload an image.
- If you want confetti in thank you page, you can enable it.
2. Title
Click on pencil icon on the right of title Thank You. Give a suitable title according to your preference.
To change the font styles,
- Click on
Titlefrom the right panel - Select the font weight from dropdown
- Change the font size
- Change the font color
3. SubTitle
Click on pencil icon on the right of subtitle Thank You for taking the survey. Give a suitable subtitle according to your preference.
To change the font styles,
- Click on
SubTitlefrom the right panel - Select the font weight from dropdown
- Change the font size
- Change the font color
Mobile View
In the top left corner, switch to the mobile view and repeat all the above process for changing mobile theme.
After making all the changes make sure to save the changes by clicking the Save button from top right corner.